

One of the best things about the internet is so many talented stampers, crafters, artists, etc share their creations online. Some of them even give you directions to make the cards. When you do use their designs it is called CASEing (Copy & Share Everything) but it is also important to give the person credit if you use one of their ideas or designs.
These particular cards used the herringbone technique. A fellow stamper, Carole Parsons shared this technique (I put her link below). It is easy to do but it does take a bit of time. I love how it came out.
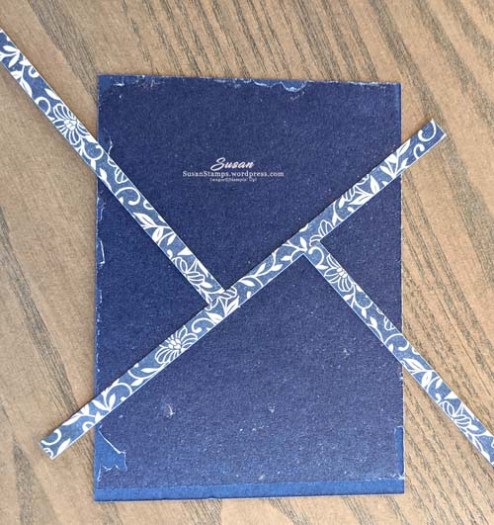
I started out with a piece of Night Of Navy cardstock that was 5″ x 3.75″. You can choose whatever color you wish, although you should try to match it to your Designer Series Paper in case you miss covering a tiny bit of it. Then I covered that piece of cardstock with our Adhesive Sheets. They make it so much easier to attach the piece of your herringbone design instead of using Stamp ‘N Seal or Multipurpose Glue.
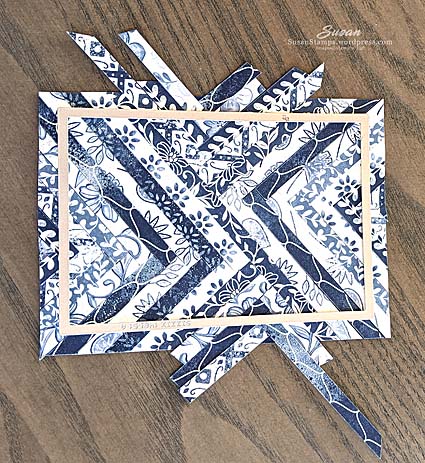
The Designer Series Paper I used is from the Boho Indigo Product Medley. This “kit” is in the 2020/2021 Stampin’ Up!® Annual Catalog. It comes with a stamp set, coordinating dies, DSP, ribbon and embellishments. I took four sheets of the DSP and cut 1/4″ strips. This gave me eight different designs because you have two designs on one sheet of paper. After adhering the Adhesive Sheet on the cardstock I placed my first three strips like this placing the long diagonal one first and then the two shorter strips:
Then you take one quadrant at a time and fill in the empty spaces with the strips of DSP. I alternated a dark strip and then a light strip and then dark, etc.
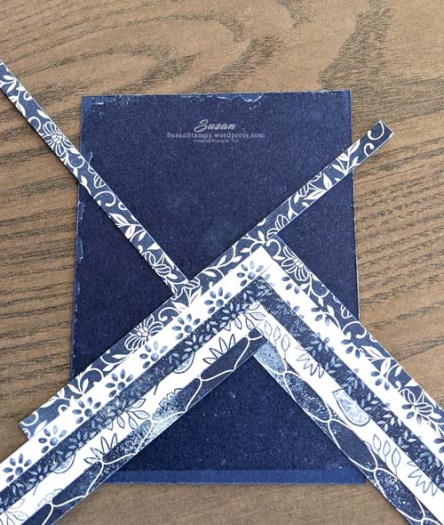

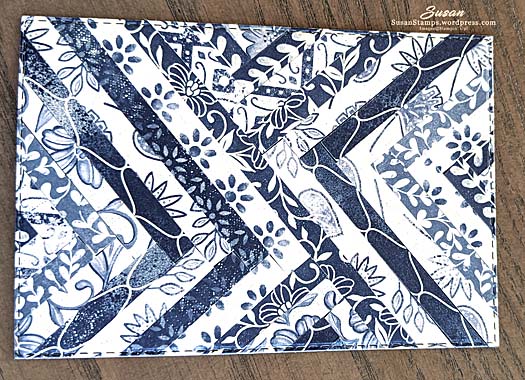
I cut all the extra sections of DSP off the ends as I went so I could use those strips on this card. Then I started on the rest of the quadrants doing one at a time.

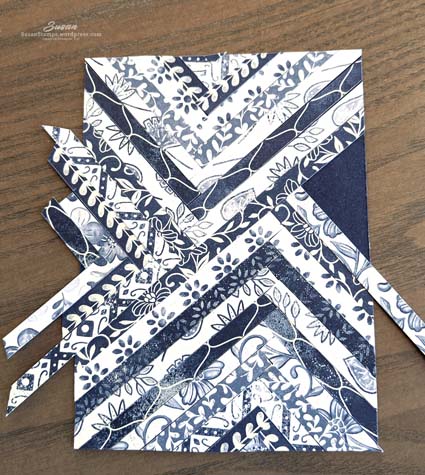
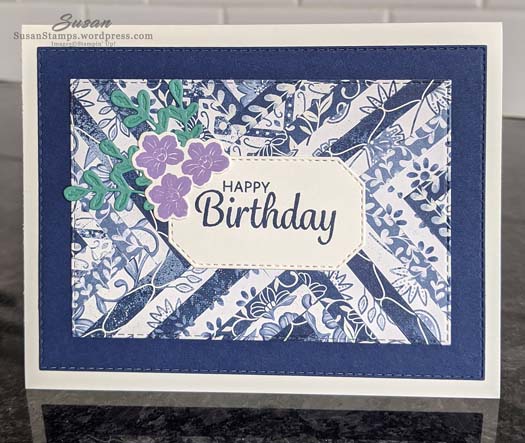
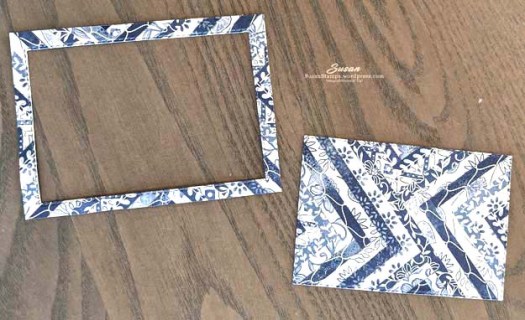
After this was all done, I used the Stitched Rectangle Dies to cut out the center.
Then I trimmed off the outside piece and used it on the other card.
I added the sentiment which is from the stamp set called Here’s A Card and cut it out using a die from Hippo & Friends.
If you wold like to see Carole’s video on how to do this click HERE.

Product List
")


Susan this is a beautiful card. Thanks for explaining the technique. I am going to give this a try.
LikeLike
Your card is gorgeous – and you have the patience of a saint! Doing all of those strips of paper – I’m sure it went quickly once you had a ‘rhythm’ going, but still…. The end result is worth all of that hard work!
LikeLike
OMGG= oh my golly gosh!! I don’t comment very often; but I simply had to tell you that this card is beautiful. Thanks for explaining & for the visual that helps me so much.
LikeLiked by 1 person
Thank you so much!
LikeLike
Beautiful card! I love that you get a frame and a background. And your instructions were awesome. Thank you!
LikeLike