Cheerful Daisies

Stampin Up Cheerful Daisies

Hello everyone.  I hope you are all doing well.  Spring has sprung here in Nashville and I am loving that it is only March.  The trees have beautiful flowers on them, the tulips and daffodils are up and open and the grass is turning that bright green.  It is a little weird though because some mornings when I walk it is 35 degrees out and other times it is 55 degrees.  It is kind of hard to figure out what to wear.  This weekend they say it might be 80 here.  I can live with that for sure!

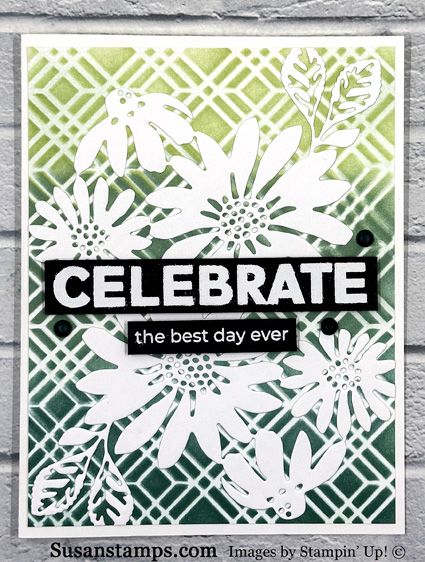
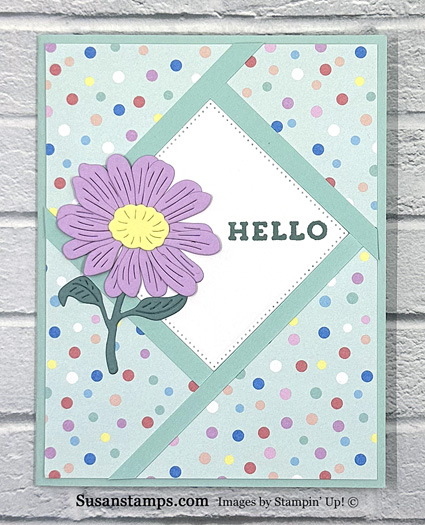
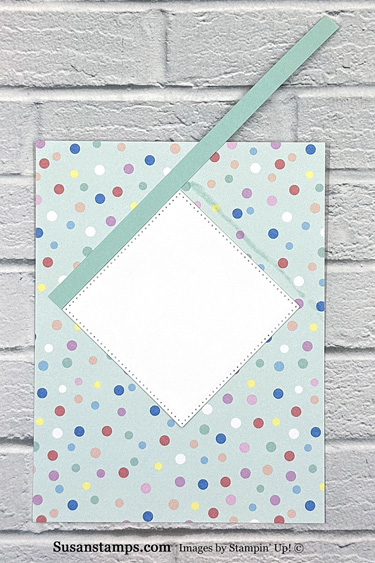
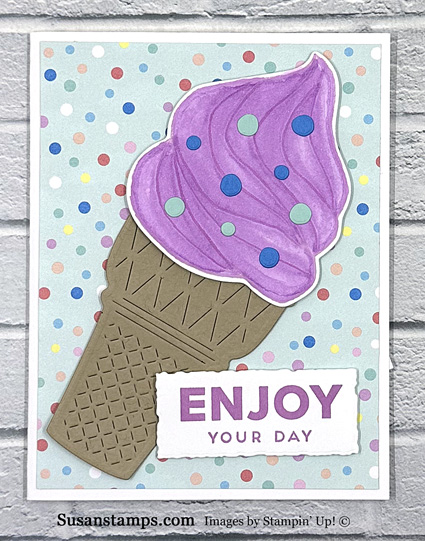
I decided to take out some of the Stampin’ Up!®  Decorative Masks (or stencils) to make a card.  I have a bunch of them but rarely use them.  I don’t know why because they add a lot of interest to a card.  I need to use them more often.  I decided to use one of the current sets called Foursquare for my card.  There are a couple ways to make masking or stenciling easier.  You can tape down the card stock and stencil or you can use what is called a sticky mat to hold both down.  I have a Waffle Flower sticky mat that I love so I used that.  The card stock and the stencil don’t move when you add color which helps.

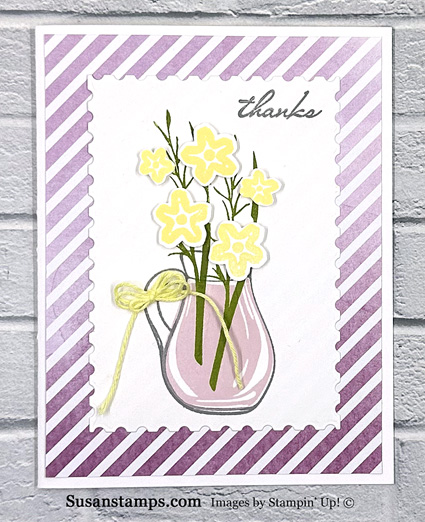
I first used a 4″ x 5.25″ piece of Basic White card stock with Soft Sea Foam ink and a Blending Brush for the top of the card stock.  Then I used Lost Lagoon in the middle and Shaded Spruce on the bottom.  When I was done, I layered that onto a Basic White card base.  Then I cut out the Cheerful Daisies large die twice and layered them on top.  I stamped both sentiments from the stamp set called Happy Little Things (which is an Online Exclusive stamp set) in Versamark Ink on Basic Black card stock and heat embossed them using White Embossing Powder.  I layered them on top using Dimensionals.  Lastly, I added some retired Matte Decorative Dots.

As a side note, the Foursquare Decorative Masks are retiring at the end of the current Annual Catalog so if you like them, you should order them soon.

I hope it warms up wherever you live very soon!

Product List


Simply Zinnia

Stampin Up Simply Zinnia

It is that time of year when we have to say goodbye to a set of InColors.  This time Sweet Sorbet, Orchis Oasis, Starry Sky, Tahitian Tide and Parakeet Party are retiring.  These colors were one of my favorite sets because they are bright and cheerful.  I hate to see them go, but it is how the Stampin’ Up!®  world works.  I decided to make a card using all the retiring colors.  It is a little overwhelming but I am ok with it.

To make this card, I first cut out all the pieces.  I just realized as I am writing this that I used all dies and no stamps on this card.  I used a few Online Exclusive products.  I first cut out the flower and leaves from the die set called Simply Zinnia in Sweet Sorbet, Parakeet Party and Orchid Oasis card stock and the little flowers using Tahitian Tide.  Then I used the die set called Wanted to Say for the sentiment and the sentiment background.  I cut out the larger circle in Tahitian Tide card stock using the Decked Circles die set.  I layered another circle using the Everyday Details die set in Starry Sky.  I layered a piece of Basic White card stock that I had embossed using one of the Basics 3D embossing folders and layered that on a piece of Tahitian Tide card stock and an Orchid Oasis card base.  Lastly, I added some 2022-2024 InColor Matte Decorative Dots.

If you like this colors make sure you stock up before they are no longer available.  Once Stampin’ Up!®  runs out of anything that is retiring, it will be gone for good.


Product List

Retiring Products & New InColors

The Annual Catalog and the January – April Mini Catalog Retirement List has been released and beginning April 9th some of the retiring products will be discounted.  You can click on these links to see the products that will be retiring:

Annual Catalog Retirement List

January – April Mini Catalog Retirement List

As a reminder, once a product sells out, it will be gone forever so if there are products you would like, you should order them as soon as possible.

Stampin’ Up!®  also announced their new 2024-2026 InColors!

Aren’t they gorgeous!  Years ago Stampin’ Up!®  had a color called Pretty In Pink but I am told this one is a bit darker than the original.  I love all of these colors and I think they will blend so well with the other colors that Stampin’ Up!®  offers.

Don’t forget the 2022-2024 InColors will be retiring this year.  Those colors are Sweet Sorbet, Parakeet Party, Tahitian Tide, Starry Sky and Orchid Oasis.  I love those colors too and will miss them.  These will sell out quickly so if you like them, you should order them now.  Don’t forget to get the ink refills for them so you can enjoy them for years to come!

Encircled In Nature

Stampin Up Encircled In Nature

Stampin’ Up!®  has been adding some new products for purchase that are not in any of their catalogs.  They call these products “Online Exclusives” because, well, you can only get them online!  There are a lot of different products including stamp sets with coordinating dies, embossing folders, Designer Series Paper and embellishments.  If you would like to see these products you can click HERE.  One of the new stamps sets that are online only is called Encircled In Nature.  This set has coordinating dies (and you can save 10% by purchasing them both using the bundle item number 163629).

I used the dies only on this card.  The first thing I did was to emboss a 4″ x 5.25″ piece of Lost Lagoon card stock using another Online Exclusive product called Basics 3D Embossing Folders.  There are three embossing folders included in this set.  Then I took the smaller of the two round wreath dies and cut out a circle on the embossed card stock.  Next, I cut out the wreath using both of the wreath dies with Basic White card stock and adhered that around the cut out circle.  I laid that on top of a Basic White card base and lightly outlined the circle with a pencil so I knew where it would be placed on the card base.

Next I cut a 3.75″ x 3.75″ piece of Fresh As A Daisy Designer Series Paper that looks like a lake or sky and adhered that over the pencil circle I drew.  I cut out the trees in Shaded Spruce cardstock and the sun in Lemon Lolly.  I embossed the sun using the Tasteful Textile embossing folder.  I stamped the birds from a retired stamp set (On The Horizon).  Then I layered the piece of Lost Lagoon card stock over the top.

The sentiment is from Waffle Flower.

Product List

Flight & Airy

Stampin Up Flight & Airy

There is only one more day for Sale-a-bration where you can earn products for free with a qualifying order.  One of my favorite is the Flight & Airy Designer Series Paper.  I love the little birds and the colors are just beautiful.  One side has different bird designs and the other side has patterns in various colors.  The colors in this pack are Boho Blue, Calypso Coral, Crumb Cake, Daffodil Delight, Flirty Flamingo, Fresh Freesia, Garden Green, Lost Lagoon (one of my favorites!), Misty Moonlight, Pecan Pie and Sea Foam Green. Here is a photo of the paper:

Stampin Up Flight & Airy

To make my card, I first cut a 5.5 x 3″ piece of the blue sky looking piece of Designer Series Paper.  I wrapped a piece of Inner Braid Ribbon around the bottom and layered it onto a Basic White card base.  Next, I cut out the three birds with some of the branches and flowers they are sitting on.  I layered them on the card together so they looked they were all on one branch.  Lastly, I stamped the sentiment from the stamp set called Charming Sentiments in Misty Moonlight ink. It was a very simple card to make and did not take long at all.

Tomorrow, February 29th is the last day of Sale-a-bration so don’t miss out!

Product List

Color & Contour

Stampin Up Color & Contour

I was looking on Pinterest the other day for some recipes (which is a great place to find new recipes!) and a photo of a card popped up using pink and gold.  It was so pretty so I decided to CASE (copy and share everything) it.  The card wasn’t made with Stampin’ Up!®  products so I improvised, changed it up a bit and made it my own.  That is what CASEing is all about.  You are supposed to give credit to whomever made the original but it was not watermarked so I don’t know who made it.

I used the stamp set called Color & Contour which is in the Stampin’ Up!®  Annual Catalog.  It has coordinating dies called Scalloped Contours.  I stamped the outline of the flowers three times in Versamark Ink and heat embossed them using gold embossing powder.  Then I cut them out using the die.  I colored the flowers using Bubble Bath and Berry Burst Stampin’  Write Markers.

Next, I inked the splatter stamp a few times with Versamark Ink and stamped it onto a 5″ x 3.75″ piece of Basic White cardstock and heat embossed it also using gold embossing powder.  I layered this onto a slightly larger piece of Gold Foil and a Basic White card base.  The sentiment was hot foiled using a  hot foil plate from PInkfresh.  I adhered it using Dimensionals.

Product List

Simply Zinnia

Stampin Up Simply Zinnia

Stampin’ Up!®  is now offering some products that are not in a catalog but are just online.  You can find these Online Exclusive Products HERE.  There are a lot of different stamp sets, dies and other products you can buy.

One of the Online Exclusive products that will be available beginning in March is called Simply Zinnia.  There is a stamp set and coordinating dies in this bundle.  The dies are fun because they cut out some of the stamped images and they have stand alone dies too.  I made this card using a few of the stand alone dies.

I also have been seeing “Fractured” cards all over the internet so I decided I wanted to try one.  They actually look more complicated than they are.  To make it, I first cut out a square from the Stylish Shapes die set in Basic White card stock. Then I adhered it to a 4″ x 5.25″ piece of Lighter Than Air Designer Series Paper.  I cut four 1/4″ strips of Pool Party cardstock and adhered them around the square.  Here are some photos showing you how to do this:

Fractured Cards

I lined up the first strip along the top left side.  Then I aligned up the second strip and so on until they surrounded the square. Then you just snip off the part of the strips that hang over the DSP and layer it onto your card base (I used Pool Party cardstock for my base).  It really is very easy to do.

Next, I cut out the two flowers in Fresh Freesia card stock, the center of the flower in Lemon Lolly and the leaves in Lost Lagoon and adhered them to the card.  Lastly, I stamped the sentiments (Altenew).  The hardest part of this card was picking out the colors!

The products will be available to purchase in March, therefore, I can not put the links to them until then.

Product List


Painted Lavender

Stampin Up Painted Lavender

Stampin’ Up!®  has been putting together suites bundles for a while now but occasionally they put together a giant suite that is full of lots of products.  The January – April Mini Catalog has one of these suites called Perennial Lavender.  It includes two stamp and die bundles (Painted Lavender and Perennial Postage) along with Perennial Lavender Designer Series Paper, Paper Butterfly Accents and Purple Shimmer Gems.  You can order all of these products with one item number (and you still get your 10% off each of the stamp and die bundles.  It can’t get any easier!

I used the Painted Lavender stamp set and dies and the Perennial Lavender Designer Series Paper for my card.  First, I cut the four rectangles out of the DSP.  Two of them are 1.5″ x 3″ and the other two are 1.5″ x 2.25″ and layered them onto a Crumb Cake card base.

Next, I stamped the lavender in Highland Heather ink and the stems in Lost Lagoon.  I stamped the sentiment from the Charming Sentiments stamp set  in Highland Heather ink and cut it out using one of the Stylish Shapes dies.  I layered that over the flowers using a Dimensional.

Product List


Ice Cream Swirl

Stampin Up Ice Cream Swirl

For the past few years, my daughter-in-law, Tara has asked me to make Valentines for the kids to give to their classmates.  I have always loved that she asks me and I have a great time designing and making them.  When the 2024 January – April Mini Catalog came out I thought they would love the Ice Cream Swirl bundle for their cards so I purchased it and made a couple of different designs for their cards.  I thought the cone die was so cute because it opens and closes.  Then Tara called me and said that Nolan wants a Buffalo Bills Valentine and Madelyn wants a Taylor Swift one (LOL)!  Of course I would make them what they wanted so I purchased the Buffalo Bills and Taylor Swift jpg so I could print them off for their cards.

It is ok though.  I will still use the Ice Cream Swirl bundle for other cards and made this one today.  I first cut out the cone in Crumb Cake card stock.  I love how the die cuts it out and there is also another die that cuts out the design on the cone.  Then I stamped the ice cream in Fresh Freesia ink and colored it with Iight and dark Fresh Freesia Blends.  I layered the cone onto a piece of Lighter Than Air Designer Series Paper and the ice cream using Dimensionals.  Then I cut out some of the sprinkles in Azure Afternoon and Pool Party card stock.  The sentiment is from a Sale-a-bration stamp set called Heartfelt Hellos.  You can get this stamp set for free with a qualifying purchase.  I stamped it in Fresh Freesia ink and cut it out using the Deckled Rectangle dies.

Product List

So Refreshing

Stampin Up So Refreshing

It has been a tough winter here in Nashville.  Well, let me clarify that.  I came from living in Northern New York where the winters were always tough.  Now that I have lived in Nashville for the last four years, I am become somewhat of a southerner where a couple of inches of snow is tough so when we got 8 inches of snow one day, it was a blizzard!  The temperatures have been cold too.  We reached below zero one day but the majority of the mornings have been in the 20’s and 30’s.  That is downright cold for this area.  I decided to make a spring card today thinking that perhaps I could warm the place up a bit.  I’ll let you know how it works.

I made this card using a bunch of different Stampin’ Up!®  products.  The first thing I did was stamp the pitcher from the stamp set called So Refreshing in Smoky Slate ink onto a piece of Basic White card stock.  Then I stamped the inside of the pitcher in Bubble Bath ink and the stems in Granny Apple Green.  I cut it out using a new die set in the January – April Mini Catalog called Perennial Postage.   I layered that onto a 4″ x 5.25″ piece of Bright & Beautiful Designer Series Paper and a Basic White card base.

Next, I stamped the flowers from the stamp set called Petal Park in Lemon Lolly ink and punched them out using the coordinating punch.  I layered them on top using Dimensionals.  I stamped the sentiment from the stamp set called Timeless Arrangements in Smoky Slate ink.  Lastly, I added a Lemon Lolly bow using Baker’s Twine Three Color Pack.

Wish me luck on that warm up!


Product List